
Experimental Log Entry - Asymmetrical Model (Part F)
- Nana Gachiko
- Nov 19, 2022
- 3 min read

Updated: Nov 28, 2022

Let the Rig Begin (Part 1) - Prepping the meshes
It's finally time and we can start with the rig, well, wireframing to be exact. This will be a fairly boring process but repetition is the best teacher, so I guess it will be just a collection of screen captures where I will show how and why I opted out to mesh certain parts a certain way.
But first, let me state that this model is going to be rigged with the paid version of Live2D Cubism, meaning I will be overusing deformers and ignoring everything I'd teach people who were going to use the free version.
MESH TYPES
I make use of 3 different mesh patterns, each have their own justification for existing and I will try to explain them here.
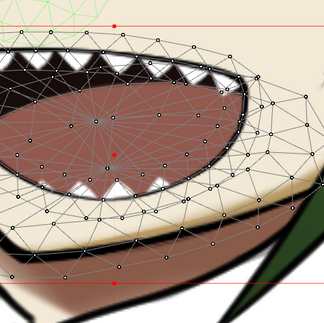
Centered Meshes: These meshes have all have a center point, the idea is that while morphing, that you are going to morph it so that the center is moving more than the outside.


Parts, where I usually use this on would be the eyeballs, eye white, breasts and any round parts in general.
Aligned Meshes: These are mainly used for parts which have to bend a specific way or long slim parts in general. The hair strands are all usually meshed that way.


By doing that not only do you have great lines which can be used as a guide for setting up Path Deformers, but you can also morph it without it losing the initial shape too much.
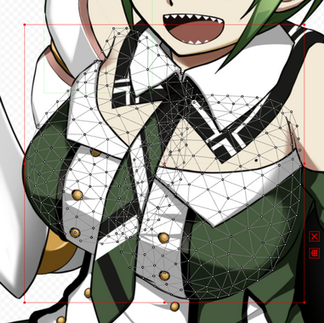
Hybrids: Sometime I will make use of hybrids using the both above-mentioned methods. The idea behind this is that this part has multiple places in its mesh, where it is suppose to behave differently. This method sometimes work wonderful, and sometimes barely works.


It's a spiel that can be applied in all shape and forms as you can see here. I dare to say that this variant is the most experimental-happy one out there. As you get more experienced with the tool, and your understanding for how meshes behave, this method is probably going to be one of those you're going to apply before you even notice it.
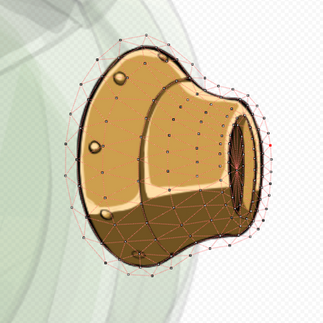
Limitations: The above mentioned methods are great for smaller parts but what about more complex ones? There is a practical limit of polygons which one can set manually, before the computer suffers from serious performance problems, to the point, where it is literally impossible to set a new point accurately.

This here is roughly the amount one can mesh, before one hits this limitation. So what should one done in such a situation?
Automatically generated meshes: There's a built-in auto mesh feature in Live2D Cubism. Most people are using this tool to generate all their meshes, it is super fast, super efficient and it cuts down the time by probably 40-90% of the rigging time. So why am I not using it all the time?

The main reason why I am not using it all the time is because, naturally, I cannot control the way the mesh is being generated, or to be more precise, the pattern. It will try to generate "perfect" triangles, which is fine and dandy, they just ain't so good in deforming than specifically planned and manually setup meshes.
So, why am I still using it, and if I do, which setting am I using? It depends, I am using it on parts which barely get any deformation, in this case, the bottom part of the skirt.
The first variable depends on the size of the part itself, don't rely on the 20... the second one is usually about half of the first. What matters to me are the last 2 parameters, I always use 0 and 1. Please be aware that the automatic mesh generator occasionally can cause the app to crash or generates a bad mesh (the object will turn invisible due to an open mesh). Be sure to always save before you apply a new automatically generated mesh.
TO ROUND IT UP
There are many different approaches in prepping your mesh, and everyone does it a bit differently, despite there being a general idea of how to do things. It's the small differences which makes a difference here... the density of the meshes, which meshing technique is being preferred, is it a majorly auto generated one or a manually drawn one etc. etc.


With the model properly meshed, I am going to end the blog entry here. Next time, I will write a bit about assigning the meshes to deformers.
PS: Here's a visual of how the whole model looks like at the moment, not helpful at all, I just love to show how crazy it usually looks when something has been meshed. Meshing time... probably around 15-20 hours.

Comments