Experimental Log Entry - Asymmetrical Model (Part G)
- Nana Gachiko
- Nov 28, 2022
- 4 min read
Updated: Dec 6, 2022

Let the Rig Begin (Part 2) - Pre-assigning meshes to deformers
It's time to assign our parts to their first deformers. With the free version of Cubism Live2D, we can't do that, but in the professional version of Cubism Live2D, there is the option to stack deformers, as a result, there are many interesting things we can do, as usually each part and deformer should only be linked to 1-2 parameters, which will be responsible for animation and tracking later on.
I usually assign each part to a warp deformer by default and group parts together that belong together (e.g., all parts of the left eye) into another warp deformer. sometimes it can get even more complex than that. So before we go too deep into this, let me just assign every single part to a warp deformer first. I will show you screenshots of the head parts but not the whole model, this will probably already be obnoxious enough.
NAMING CONVENTION
Just like every other part mentioned previously, I will also have a naming system for deformers. Everyone will probably have a different way to name them, but for me the following works best...

So, by default, the warp deformer creator will give it some stupid random name based on which group the part is currently assigned to. In this case, the REye. Let me must create it and let's see what the result is.

As you can see, it generated a deformer with that name and an ID named Warp. Obviously we want to change that, for one, we will be working with many deformers which will be part of this right eye, and having all deformers named "Warp, Warp1. Warp2, ..." is only going to result in confusion. Which is why I usually do it like the following:

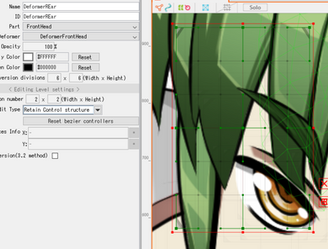
Now while we are at it, let's also talk about "conversion divisions" and "division number". At the current setting, the grid is divided into 25 squares (5x5) and they can be manipulated by the crossing points or these green handles (set to 2x2). I've marked some down to visualize it.

Now this is my experience, but I am not a fan of an even division number, because the center cross overlaps with the center point of the deformer, resulting in moving the whole deformer and not the point I want to manipulate. Which is why I always opt for an odd division number (aka 3x3, 5x5, etc.)... This kind of solves the problem. Regarding the conversion division, the world is your oyster, the more you have, the more detailed your deformation can be, but also the more time it takes to make it look right.
DEFORMER GROUP EYES
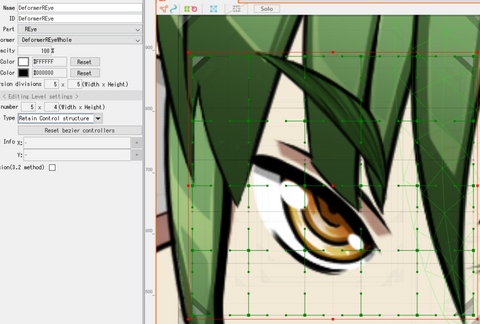
For both eyes, the structure is now the following (example on the right eye, but applies to both):
DeformerREyeWhole
DeformerREyeBrow
DeformerREyeLid
DeformerREye
DeformerRLashTop
DeformerRLashBottom
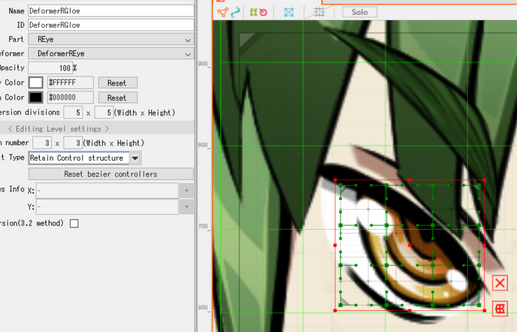
DeformerREyeGlow
DeformerREyeIris
DeformerREyeShade
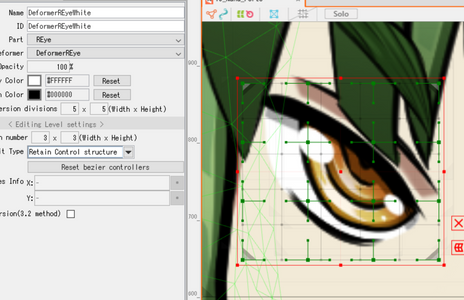
DeformerREyeWhite
Let me put a gallery here of each deformer of the eyes to help visualize this:
Not sure how helpful this is, it is mainly here to show you how I approach these things, basically packaging until I have a package of a specific group of boxes which can be categorized as a "body part". Keep doing that and eventually you have the whole model inside a box, kind of how moving houses is like.
DEFORMER GROUP NOSE
The nose deformer group this time is comprised of 2 sub deformer and 1 main deformer (nose tip, the visible part, nose form, the bigger one which will cover the right eye when the face is turning left and the nose deformer which is the one above those 2.

DEFORMER GROUP MOUTH
A bit more complex than the nose but still fairly easy is the mouth.
The Structure is as the follow:
DeformerMouth (The closed mouth is linked to this deformer directly)
DeformerTeethTop
DeformerTeethBottom
DeformerTongue
DeformerMouthForm (the outline + the back of the mouth)
DEFORMER FRONT & SIDE HAIR
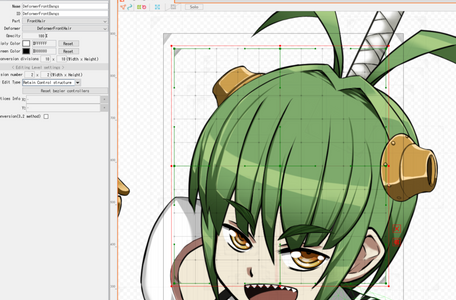
The front and side hair are being grouped into a couple of deformers, the front hair is bundled into one group first, same with the side hair.
DeformerFrontHair
DeformerFrontBangs
DeformerRHairSide01
DeformerLHairSide01
FACE (GROUP)
The parts of the face have pretty much all been grouped up at this point, so let's assemble them.
DeformerFrontHead
DeformerFrontHair (done)
DeformerLEar
DeformerFace
DeformerMouth (done)
DeformerLEyeWhole (done)
DeformerNose (done)
DeformerREyeWhole (done)
DeformerFaceBase (done)
DeformerREar
Here the new parts...
ASSEMBLE THE HEAD PARTS
Let's assemble the head now, linking the remaining parts.
DeformerHead
DeformerFrontHeadAdd (adding the remaining parts from the sides)
DeformerLHairAccessory
DeformerFrontHead (done)
DeformerHairSideBack01
DeformerRHairAccessory
DeformerHairBack
DeformerLAhoge
DeformerRAhoge
DeformerHairBack01
DeformerHairBack02
DeformerPonytailStick
DeformerPonytail
Front Head additional parts:
The head accessories are put into one standard warp deformers each.

The hair side (back) is just one single strand...

DEFORMER HAIR BACK
This group is quite straightforward, a couple of parts and each have their own warp deformer.

Ahoge parts...

The back of the head...

aaand the ponytail... oh yes, you can tilt/rotate/rescale deformers, you do so by holding the CTRL key and using the left mouse button.

Finally, group those parts together (DeformerHairBack) into a warp deformer and select the deformer for the front head (DeformerHead) and create a warp deformer for them (DeformerFrontHeadAdd).
ATTACH THE HAT TO THE HEAD
Last but not least, I will create a rotation deformer on the head and assign the hat to it, making it following the rotation deformer whenever the head is warped.


With that we have at least the head prepared for actual rigging. Next time, I will have the whole model assigned to deformers already and we will be working on the head rig.











Comments