Experimental Log Entry - Asymmetrical Model (Part H)
- Nana Gachiko
- Dec 6, 2022
- 7 min read

Let the Rig Begin (Part 3) - Rigging the Face
Okay let's start with the fun part of rigging (not really). We will start to bring motion into the model. I won't be going too deep into this, since it's fairly difficult to explain things accurately in written form, there are plenty of video tutorials out there which do a better job than I will ever be able to in this blog format. I will however break down the parts and try to explain to my best what I did there and why.
There are many crazy things you can do in Live2D nowadays, such as embedding animated motion, reactions, adding animations to the irises of the model's eyes, interactive finger tracking, the list goes on. These however are not the 'essentials' in the classic Live2D's sense of understanding, as they have been added at a later stage. With that said, I will probably not write anything about any of these should I decide to add them at a later stage.
THE MOUTH
The mouth is probably the most complex (standard) part in any Live2D models. There are different approaches to tackle it and I probably have mentioned it in my tutorial blog series that my approach is basically the "morph the mouth" and not the "cover the mouth with lips" approach. Both techniques have their own advantages, with the first one is generally faster to setup, but works with opacity and the latter is more of a quick and dirty cover-up approach but it is very efficient and is easier to learn and deal with. I generally use the former approach, as I did here, but I cannot stress enough how great the latter one works, from my own experience, I am just too lazy in the drawing and cutting phase to make use of it. Here's a comparison:
MORPH THE MOUTH:

A lip line for the top part of the lip without a "coating", giving you a crisp black line, of which you have pretty much perfect control over.

The mouth outline is a separated object which can then be morphed alongside the back of the mouth (the tongue/teeth are clipped to the mouth back) to make all the mouth motions. Naturally the lip line will be positioned accordingly.
COVER THE MOUTH WITH LIPS:
While this method will not be used for this project, here's a comparison of a model I've rigged (although not drawn) from another project, where the other method was used.

As you can see, the structure is completely different. The lips are used to cover the opened mouth and this method is actually quiet efficient and quiet quick to pick up and get used to. Both methods come with pro and cons, but there isn't a right or wrong.
Okay with that covered, let's get back to the model in question and I am going to show you a couple of states.
This is the grid I have for all the mouth states:

This might receive some refinements later on but for the time being I can live with the results (I'm lazy okay...).
THE EYES
Let's talk about the eyes real quick. The eyes are distributed between a couple of parameters, for this model, I am utilizing the following:

EYEBALL_X, EYEBALL_Y
Let's start with the easy ones, the Eyeball X and Eyeball Y. As what you'd expect, nothing special going on here apart that I had to manually do the corners, as I had to do with every single parameter groups for this project. Deformers which are assigned on this parameter are the left and right iris deformer and the eye reflection deformer. These are morphed separately for each eye.
REMINDER: If your project is centered, be sure to make use of the synthesize corners function here, with that, you only have to rig the up, down, left, right states of the eyeball positions and the program will set the corners based on those 4 states. This method could also be used for other parts such as head turns.

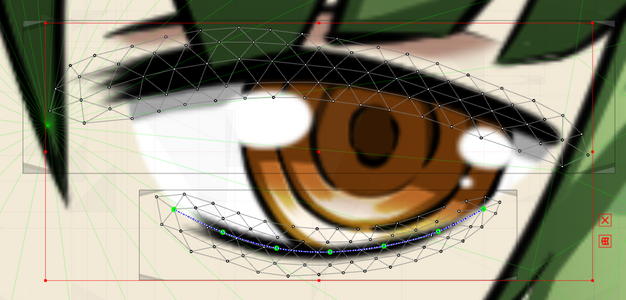
EYER_OPEN, EYEL_OPEN
The eye open is always a mess, but I tend to enjoy doing them, depending on the ways your eyes are drawn this can be either super easy or super tedious. I've opted for an easy one here.
It all comes down to how complex the eyelines of the model are. Different styles require different approaches. For this model, which is already more challenging in other departments, I've opted for the easiest kind of eyelines, those being 2 simple lines, making closing them really easy. Naturally, the way you make the eyes appear closed is to morph the eye white and fit them under your eye lines, with each part under the eye lines clipped to the eye white.
This pretty much covers the techniques used for the rest of the model, what comes next is pretty much a lot of testing things out, tweaking parameters here and there, and build up step by step. I will not go into details from here on out since it will be fairly repetitive but instead describe what I've done to achieve the results shown in a gif animation rendered from the physics preview.
THE HEAD TURN/TILT
The challenge once the face movements are done (eyes and mouth) is to give them the right environment to flourish. That playground would be the head. How much tilt should I give the head? You will see that head turns kind of are some weird sort of a dick size competition online, each try to achieve a bigger head turn.
Personally I think that the right amount of head turn is "just about right", meaning it should look natural as you would move your head naturally while using a webcam. You'll be the judge on how much turn that's going to be.

Here's the model with the base keyframes set for the head movement, it's probably the most important phase as this is essentially what makes a model feel alive, the head. The rest of the body helps but the head is definitely doing the most.
Let the Rig Begin (Part 4) - Rigging the Body
Since there really isn't a big reason to separate this, might as well throw it in here, let's also show how the progress of the body rigging is in form of exported gifs. For the majority of the steps here, I am specifically using the Deformer Brush Tool to warp the deformers, this is probably one of the best additions to Live2D since the initial launch.
Let's put this to the test and let me show you have to looks like just by morphing the upper body and the clothes on the lower body a little bit:

This is just adding a couple of deformer morphs on the "Body X" parameter.
Now let's go even further, remember the tedious hand segments I've prepared? Wonder what happens if I morph the hand a little bit and by changing that deformer over the hand, on which the fingers are only assigned to, but not directly part of will happen?
Let's have a look:

It's like magic, isn't it? This is still only the "Body X" parameter. This is pretty much the way how my models are rigged, little by little, body part by body part.
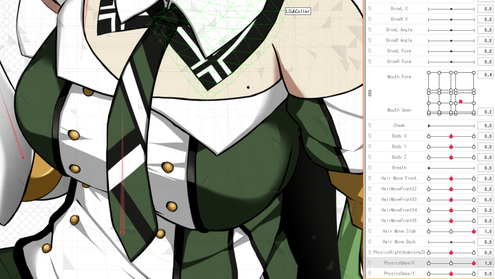
Let's also add some chest physics and you can see how much physics adds to the model, I will obviously do that with other parts as well at a later stage:
Here's more or less the result:

Please note that for physics I usually slip in additional deformers, one for the X axis and one for the Y axis. I've also added a small physics into the right arm at this stage, you can see it if you focus on it, the arm slightly edges back once it stops, giving it more character.

At this point you may have noticed that the head is moving a lot but the ponytail seem to more or less stay at the same position on the "ground". As you may suspect, that's because there are many sub deformers on it, one gets added each time there's a parameter that moves the head, it's a mess but it gets the job done (most of the time).

(Made a mistake here, the deformer is named PonyBodyX_X and not PonyBodyX_Z)
Naming convention can get a bit messy here, I am sure you can do a better job than I am showing here, but I generally am too deep into the rigging that most of the time my brain blanks out at this stage.
Let's add some tilt motion to the Body_Z parameter. a bit messy, but not too complex. This model has a upper body deformer group which is assigned to the bottom body deformer by a rotation deformer. By rotating that deformer a little bit, and then adjusting the upper body deformer a bit, you will get something alike the following:

Obviously you will have to do some tweaking here and there. I have also worked a bit on the ponytail by adding another deformer layer for Body_Z.

Let's play around with some hair physics and look at it again.


Not bad, not bad at all. I hope you agree, this is starting to look really good. I still have to add physics to the ponytail and the 2 additional hair strands on top of the head (ahoge). So let's do just that and have another look.
Finally, this might be pushing it, but I also integrated the Body_Y parameter by moving the upper torso back and forth. You can see it here as the body slowly edges from back to forth and back:

I've also added a breathing which is also jammed into this deformer group, mainly lifting the chest area by a bit and it's kind of getting messy:

PROPS
This model was made with integrate able props in mind, the fingers were rigged into separate segments and here's a quick example of how a toggle can be set up to change the finger positions:

And with that, this project comes to a comfortable place to call it "done" for the time being, until extras and minor corrections are added in the future. While this blog series is less of a tutorial and more of a documentation of my thought process, I hope that whoever out there who is reading this has enjoyed the read and gotten at least something new out of this.
Nana, signing out.


Comments